If you've noticed water on your sidewalk or walkway, after you've turned off your sprinkler system, it means that you may have an issue of leaking sprinkler head. Of course it cannot be concluded that it is due to a leaking, it could also be due to low head drainage. So what exactly is the difference between the two? In case of low head drainage, the water continues to flow out of the head after turning the system off, but stops after a few hours or so. In case of a leakage, the water continues to flow and doesn't stop.
There could be two possible causes behind this. One, clogging of the sprinkler head, and two, leaking control valve. Clogging usually occurs after the installation. Checking for clogs in the sprinkler heads could solve the problem. Repair is possible without a professional help when the right procedure is followed.
Clogged Sprinkler Head
The pop up sprinkler head is the most common in use. Therefore, the following procedure is to solve the problem of the same.
» Inspecting
The first step is to check for the spot from where the water leaks. For this, of course, turn on the sprinkler system. This would help you determine where the leak is. Sometimes it can help you determine the cause of the leak.
» Check the Head
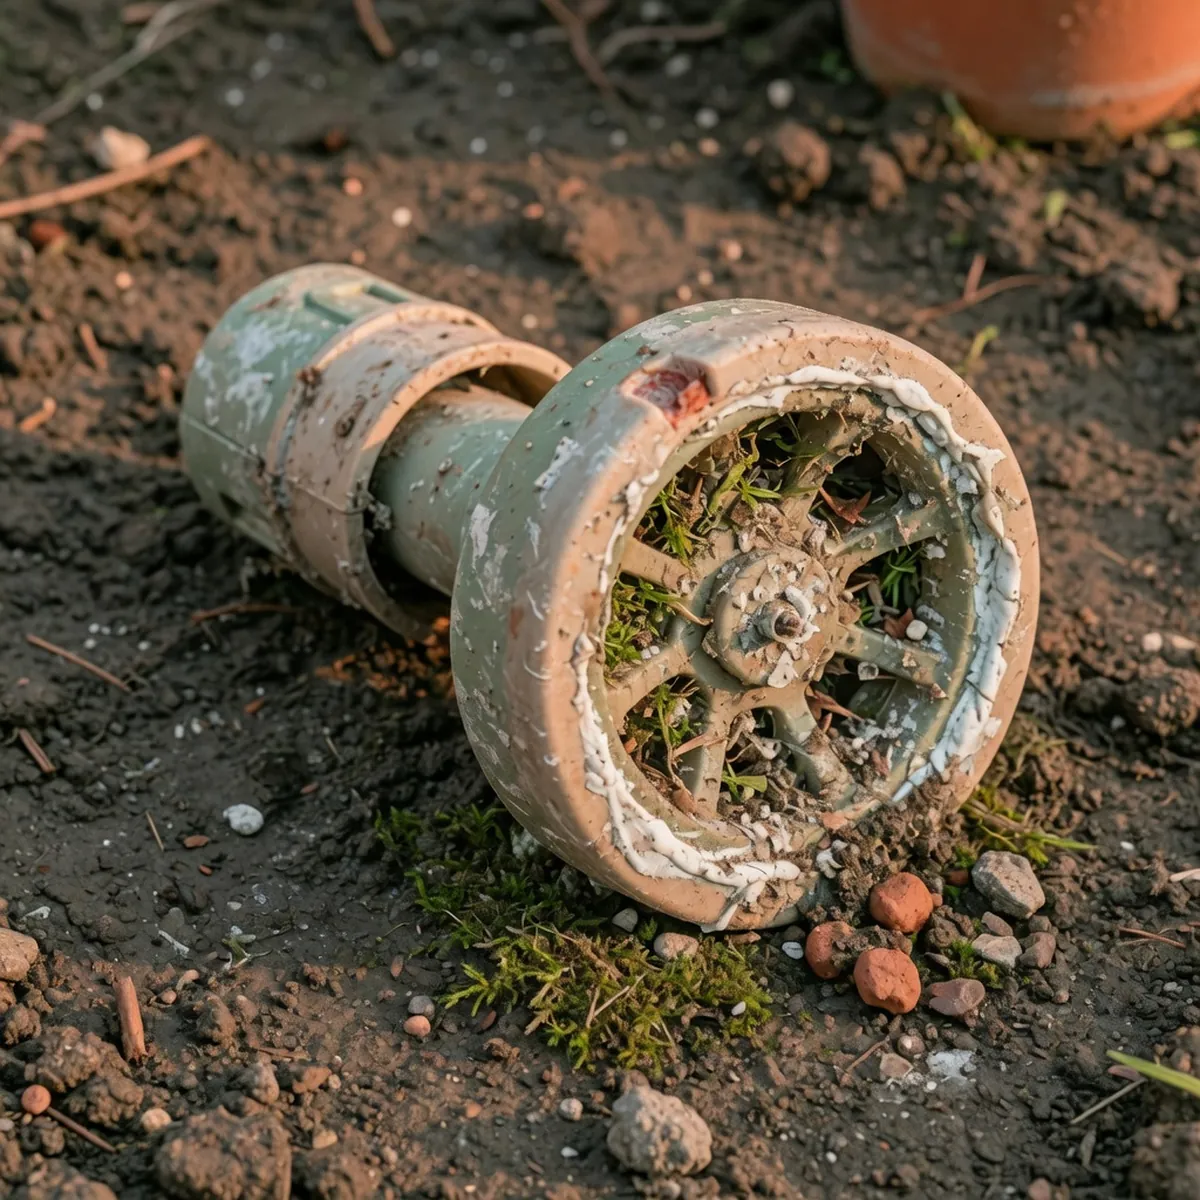
For this, a shovel would be required to dig up the sprinkler head off the ground. To remove it, twist the cap that's at the top of the sprinkler body. The shaft that pops up with the water pressure is inside the cap. So unscrew and remove the head from the shaft. To remove the filter inside the shaft, turn it upside down, and shake it a little for it to be off the shaft. Check the filter for any possible debris that might be clogging the filter. Also check the head for any debris stuck in its spray area.
» Check the Riser and the Fitting
If the water leaking was found to be at the bottom of the sprinkler body, then the leak should be at the fitting or the riser. Reach the fitting by digging down using a shovel, and turn the water on. Check if any leaks are visible at the fitting. If the leak appears to be in the area where fitting is connected with the riser, remove the riser, and inspect the threads at both the ends. If no damage is detected, reconnect the riser.
» Test
The final step to this is testing, to check if the leak persists. More often than not, sprinkler heads leaking are due to clogging of the head, and it should be resolved once the filter is cleaned. If the fitting is damaged then it needs to be replaced, and if it's the riser that is damaged, use a Teflon tape and wrap it around the threads.
Leaking Control Valve
This may seem to be a slightly elaborate procedure, but it is advisable to check for a leaking control valve in case of leaking. For this sprinkler head repair you'd need a hand trowel, a screwdriver, waterproof wire nuts, diaphragm nuts, some rags, and some crushed rock.
» Turn Off the System
To start with the procedure, the electrical power supply and the water supply to the sprinkler system must be turned off. This obviously is done to ensure safety while carrying out the procedure of repairs.
» Check the Valve Box
Open the valve box of the sprinkler system. Using the hand trowel, clean the accumulated mud out of the area. To absorb the water that remains inside the box, stuff it with some rags. Also remove the wire connectors from the low voltage electrical line, and loosen the solenoid valve. Ensure all the water is drained out of it.
» Examine the Diaphragm Gasket
Take the bonnet off the solenoid. Remove the diaphragm gasket and spring placed on the solenoid valve. Check the gasket for any damage. Also clean off any debris that may be affecting the operation of the solenoid. If the diaphragm gasket is found to be damaged, replace the old gasket with the new one. Place it on the solenoid valve and then also fix the spring on it. Fix the new bonnet.
» Test
Fix the solenoid into the valve box and using the waterproof wire nuts, connect the low voltage electrical line. Remove the rags that were stuffed to drain out the water. Now, fill the valve box with the crushed rock. Close the box, and turn the water and electrical supply on to check for any leaks.
It may seem like a tough job but fixing a leaking sprinkler head isn't that difficult. So the next time you see water flowing down your sidewalk, you know how to fix it.