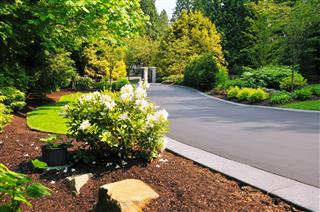
Concrete driveways have a tendency to develop cracks and potholes over a certain period. Resurfacing the damaged sections of a driveway is often the most sensible and cost-effective of all available options. Resurfacing is a good home improvement option as it saves a lot of money, adds to the visual appeal of the landscape and also takes less time as compared to other methods.
When we compare a concrete driveway with a gravel driveway, it seems that while a concrete driveway lasts up to 25 to 30 years approximately, a gravel driveway can live as long as 100 years with the minimum maintenance; the former being a preferred option though.
It is quite a common sight these days – your driveway, a silky smooth concrete beauty not too long ago, is now all cracked, potholed, wrecked, and a sight that you’re unable to look at. Extreme temperatures, rain and atmospheric factors subject concrete driveways to a considerable amount of wear and tear.
To start with, you have the option of reconstructing the entire driveway, but that will cost you a fortune. Instead, you wonder whether it could be possible to repair just the damaged section of the driveway, and in the process, save some dough. Well, that sounds better. Repairing or resurfacing your concrete driveway can help you save up to 50% of the total cost, that you would otherwise have incurred in reconstructing it entirely.
Concrete Driveway Repairing
The primary step in the repairing phase is to clean the concrete surface thoroughly. Sweep the area with a firm brush, if necessary.
After sweeping the area, take a strong hose pipe having adequate water pressure and spray water into cracks and holes to remove all the dust, dirt and loose debris.
After sweeping and spray cleaning, it is necessary to repair the cracks that have developed. This is done by priming the cracks and then filling them with elastomeric repair material. Further reinforce the cracks with fabric and apply an elastomeric base coat over the cracked surface. Multiple patches of polymer concrete must be then laid out onto the cracked surface, after which these patches are ground to make them smooth and in level with the surrounding surface.
Concrete Driveway Resurfacing
A prime coat and a granule broadcast are applied evenly over the entire area that is to be resurfaced. The next step involves applying a texture coat over the entire area. For this purpose, ultra surface polymer concrete is first prepared according to the specifications mentioned on the package. It is then sprayed evenly onto the concrete surface using a special type of spray gun.
After resurfacing it is very important to see that the above layers are evened out properly. Hence, it is necessary to smoothen and level the surface with a trowel. Remember to wear hand gloves and footwear while doing so, else you might end up being stuck in the concrete.
While resurfacing if you fancy a colored driveway, then you might consider applying a coat of color on top of the surface. Finally, apply a layer of seal coat and leave it for drying.
Remember
Make the driveway accessible for vehicular traffic only after 2-3 days of complete drying. Consider weather condition before planning the task of resurfacing your driveway. A suitable temperature for resurfacing the driveway would be 70° F with a damp surface. While in cold weather, it takes longer for the curing process; during hot weather it should be dampened at regular intervals to slow down the process.
Resurfacing a concrete driveway can be a physically demanding and time-consuming task. If you feel it is beyond your limits, you can always hire professional concrete contractors to do the job for you.


